Showing posts with label The Geeky Gourmet. Show all posts

Monday, January 31, 2011

Doot do-doot do do...

Not much to report, currently. I'm still waiting to hear back from the bakery- still holding out hope for that job opportunity. Beyond that, I will continue on in the hunt for gainful employment. It's proving difficult, but I won't give up. Someone out there wants to hire me. They just haven't met me yet.

Oh! Howie and I have started recording The Geeky Gourmet again. We're a bit out of sync, but a little practice will get us right back in to a rhythm. Unfortunately, Howie is having serious issues with his sound/recording equipment or possibly something else entirely. He's going to have to rewire his entire office tonight and hopefully fix the problem. With that said, we have yet to complete a new installment of our show. HOWEVER! Once his computer issues are resolved, we'll be back!

My apologies for not having anything fun or exciting to report. I will have something a bit more stimulating to write about next time, because I'm going on another wonderful adventure in the world of pasta making tonight! It is my intention to create delicious, homemade ravioli and marinara. I'll let you know just how delicious (or disastrous) this all turns out.

Elle

________________________________________________

Elle's Adventures in Dining out (or eating in)

Central, South Carolina (another for the locals)
Taco Loco
This small, unassuming "dive" is located in an old strip mall. You most likely would not even notice it if someone didn't make you aware of it's presence next to the Dollar General. The owners are originally from California and they've brought with them some of the best burritos I've ever had. Of course it helps that they make their own tortillas and sauces in-house. Everything is fresh and cooked to order. If you want something a little different, try a torta- a Mexican sub sandwich. You'll love every bite!
Price range: $5 to $10
Dine in, carry out


Tuesday, December 14, 2010

The 12 Days of Christmas Cooking...Day 2

I was looking up the lyrics for the "12 Days of Christmas" to be sure I remembered them correctly and I found a good wiki article that sums up the actual celebration of the 12 Days of Christmas quite nicely. For the record, yes. I realize I'm doing it wrong. The 12 Days of Christmas truly starts on Christmas Day. But sharing these ideas and recipes with you now might give you a chance to make them part of your holiday celebrations.

If you're interested, read the article here. If you're anything like me, you'll sit there reading the article going, "Oh *that's* where that came from!"
_________________________________________________
On the second day of Christmas, my true love gave to me...

Robot Salt and Pepper Shakers!
Do you or someone you know like robots? Do you have a need to season your food (the answer is yes)? Here's a great, last-minute stocking stuffer for that geeky foodie in your family! These guys seem like fairly frivolous items, but they are very adorable and would be entertaining at any family meal. They are good for everyday use or special occasions. Not only are they actually functional salt and pepper shakers...they're wind-up toys, too! Wind the key and set them off down the table when some one asks you to pass the salt or pepper.


I'm so glad I got to share my love of robots and the importance of seasoning your food all at once. Check back with me tomorrow and see what else I come up with!

Elle

Saturday, December 4, 2010

A Geeky Gourmet Update

If you happen to listen to the show, I'm sure you've noticed we haven't posted a new show in quite some time. We haven't given up on the project and I really hope no one has given up on us. We've taken a bit of a hiatus. There are a few reasons we haven't recorded another show recently and I just wanted to let you all know what was going on.

  • Howie has been utterly exhausted with life lately. To be honest with you, I'm not sure what exactly has been going on. I just know that he is usually very good at juggling a lot of things in his life at once and right now, he's just really tired. No shame or blame there.

  • Our schedules haven't matched up well. Between Howie's work schedule, my school schedule, and our other various commitments, we've not been able to find a time to record that really works well for both of us.

  • My life hasn't necessarily been boring. Charlie and I have had company from out of town, then we went out of town to visit his family. We got engaged! Finals are coming up soon. My family has had various surgeries and travels. There seems to be a lot going on.

We are also going to change our format a little. Instead of pushing to do a show once a week, we are going to try 2 a month until we can get into a better routine. I'd rather give our listeners really good quality shows a little less often than mediocre shows more often. Other than that, we'll still be talking about great things and being silly! It's what we're good at :)

We're at 199 followers on Facebook, which is amazing. I'm excited to know that almost 200 people have heard of us in one way or another. We'd still like people to follow us on twitter if they are so inclined: http://twitter.com/geekygourmet. And if you have any holiday recipes, show ideas, questions, comments...anything (except spam), I would really love it if you e-mailed us at thegeekygourmet@gmail.com

The next show I hope to record sometime very soon. During the last show, we said we would be talking about tomatoes in our next episode. I had a change of heart and the next show will be about apples. Then to follow that we will hopefully be talking about cookbooks and kitchen gadgets. Please keep an eye out for the next show and keep listening!

Thank you all so much. We'll be back as soon as we can.

<3 Elle (and Howie, too)

Monday, October 25, 2010

What we can learn from "My Cousin Vinny"


To be honest, I'm still a little mad at Howie for trying to "out southern" me with Joe Pesci quotes. There's just something so very wrong about that. And besides, it doesn't take that long to cook oatmeal either, but he cooks that in the crock pot. So why not grits? It's the same principal. The whole point is to slow cook them while you're asleep so you wake up to a yummy, warm breakfast that's ready to go. If you have no clue what I'm prattling on about, you should listen to show #6- The Crock Pot Show! We took a step back from the "gourmet" side of the culinary world and relaxed in the homier side of cooking. Crock pots are the original "set it and forget it" machines that can make meal time a lot easier.

I was a little worried about this one. It seemed that when we recorded, there was more of us goofing around than there was actual information. But somehow, by Howie's editing magic, this one came out great. I hope you have or will enjoy it!

I did want to mention something that got left out that I, personally, deem important when it comes to crock pots or slow cookers. So here we go...
Buying a crock pot- When I first starting thinking about this show, it occurred to me that a lot of people think all slow cookers are created equal. Nope! Not true. There are some things that are good to consider when purchasing a crock pot.
1. Buy the size suitable for your space. If you live in a small apartment with a teeny kitchen, chances are there are only one or two of you living in that space. There is no need for you to have a giant 7 quart slow cooker hogging the precious little counter space you have. A smaller 1.5 or 2 quart model ought to suit your needs well and can easily make enough to feed up to 4 people.
2. Buy a slow cooker with a removable crock. It makes life so much easier when trying to clean up. It's also handy when you've made a big meal and have leftovers. You can leave everything in the crock, cover it, and put in the fridge. When you want to reheat it, just stick it back in the heating element.
3. Look for temperature settings and timers. Newer models with timers and auto-function settings are awesome. But at the very least, your crock pot should have low, high, and warm temperature settings. I speak from experience on this one. I have a small crock pot with no temperature control. When you plug it in, it goes to whatever temperature it feels like that day. Uhg.
4. Think about what you'll be using your crock pot for most often and keep that in mind when going to purchase one. If you plan to use it for family meals, I recommend a simple model that is size appropriate. Keeping the controls simple will allow multiple family members to use it properly and perhaps give mom (or the head chef) a bit of a break. If you plan on using it for pot lucks, small catering events or anything where the food should be portable, consider a model with a tight fitting and/or locking lid. If it's just to hold meatballs, cocktail smokies, or nacho cheese warm on game day, I'd get a smaller one with simple temperature settings and a removable crock so you can let it soak for 2 days after your husband/boyfriend leaves it on high for the entire game and after the party. Or to avoid this disaster, buy a crock pot with a timer and set it to automatically turn off by the 3rd quarter.
5. Always buy a brand that has a decent warranty. Crock Pot, Rival, Hamilton Beach, Kitchen Aid, All-Clad...these are all brands that come with at least a limited warranty. As with any small appliances, follow through with your end of the warranty agreement. Send off what ever receipts and papers you need to. It might seem like a pain, but it ensures that you're covered if anything breaks or goes wrong. It seems like a slow cooker would be a sure thing, but knowing my luck? Something would go wrong. I always try to send in for the warranty.
____________________________________

I messed up my information a little during the show and would like to clear a few things up. I said that the running temperature for a crock pot is 190 degrees to 215 degrees F depending on your settings. I was a little off. The correct range is 175 degrees to 215 degrees (again, depending on what setting you have it at). I also kinda stumbled over my words when I was trying to explain why vegetables take longer to cook in a crock pot. Let me try that again. Veggies usually respond better to high heat methods of cooking like sauteing or boiling. It has a lot to do with water content and drawing out the water as fast as possible to preserve the color and nutrients of the vegetable, while still cooking it through. That's why steaming root vegetables, especially, takes forever. If you're going to cook veggies with your protein, place them at the bottom of your slow cooker (under the meat) so they will be immersed in liquid and cook evenly.
____________________________________

While researching recipes and clever trivia for the show, I came across a wonderful site. I'm sure it's one of hundreds of crock pot websites but I really enjoyed this one. It's got a lot of good ideas and recipes.

Speaking of recipes, it's that time again!

Howie's "Pot Roast"
3-5 lb chuck roast, shoulder roast, london broil... whatever roast-type beef is on sale or that you prefer
8-12 oz. white button or cremini mushrooms, cleaned and stems removed
1 medium onion, chopped
4 cloves garlic, minced
2 14.5 oz. cans of crushed tomatoes
2 tsp. salt
1 tsp. black pepper
1 tsp. cumin
additional spices*
1/4 C. olive oil
1/4 C. red wine (or white if you prefer)
1/4 C. Balsamic vinegar (optional)
Salt and Pepper for seasoning the beef

Place mushroom caps at the bottom of your crock pot, stem-side down. Heat a large skillet with about 1/8 C. olive oil. Trim the roast as needed and season the beef on all sides. When the skillet is hot and the oil is just starting to smoke, sear the beef on all sides. When the meat is caramelized and seared, place it on top of the mushrooms. Add the onion to the same pan and cook until translucent-about 3 minutes. Then, add the garlic and continue cooking for about 2 minutes more. De-glaze the pan by adding about 1/4 C. red wine. Allow to simmer for about 2 minutes, then pour the onion mixture over the beef and mushrooms. Add the remainder of the olive oil, spices, balsamic vinegar, and both cans of crushed tomatoes. Cook on your crock pot's low setting for 6 to 8 hours.

*Howie always uses salt, pepper, and cumin in this dish. You can add whatever spices suit your taste. If you'd rather go a more Italian/Greek route, I recommend rosemary and oregano.

After that great meal, what about dessert? I got ya covered.

Basic Bread Pudding (please personalize this any way you'd like)
3 C. day-old French bread*
3 large eggs
1 C. heavy cream
1 1/2 C. whole milk
1/2 C. brown sugar
1/2 tsp. salt
2 tsp. vanilla extract
2 tsp. Whiskey, Brandy, or Bourbon
1 tsp. cinnamon, ground
1/2 tsp. nutmeg, ground
1 C. fresh or frozen berries, stone fruit, bananas, apples, chocolate chips, or what ever flavorings you'd like
2 Tbsp. butter

Grease the crock with 2 Tbsp. butter. Cube or tear bread into 1 inch pieces and place in the crock pot. Sprinkle the flavorings of your choice on top of the bread pieces. Whisk together cream, milk, vanilla, liquor, salt, and spices. Pour over the bread and flavorings. Cover and cook on low for 2 1/2 hours. Raise the heat to high for another 30 minutes. You'll know it's done when you insert a knife into the middle and it comes out clean.

*If your local market has an in-house bakery, chances are you can get the "fresh baked" left overs from the day before at a discounted price. Any bread with a chewy, soft texture will work. Avoid using loaf bread or something too hard like a baguette.
____________________________________

I'm currently in the testing phase of my Swedish Meatball challenge. When I've got it where I'd like it, I'll let you know. For now I'd just like to share my ideas again. Typically, the "Swedish Meatball" most of us are used to is a basic beef meatball cooked in cream of mushroom soup mix, milk, and maybe a little allspice. This dish is often served over egg noodles. I've had it before and it's edible, but Howie challenged me to make it better. Here are my thoughts so far:

Instead of a standard beef meatball, a combination of ground veal and lamb would be much more flavorful and meaty. I'd also like to add some vegetables to make this more of a complete dish. My choices right now are mushrooms and fennel. Then to replace the cream of mushroom soup, I think a bechamel sauce finished with some nutmeg would be a good alternative. I would most likely keep the egg noodles as the starch for this dish. It sounds good, right? Experimenting and testing is the only way to know for sure. Like I said, I'll keep you posted.

Well, there you have it. 6 shows down with (hopefully) many more to go.

We do apologize for how slack we've been lately. Life seems to be giving Howie and I, both, a swift kick in the pants. We had a lot of momentum for this project in the very beginning and then all of a sudden, everything seemed to stutter to a halt. We're working to get back on a semi-normal schedule that we can both live with. Thanks for your patience. We haven't forgotten about our listeners. Please don't forget about us. Even if there isn't a blog post or a show posted, there are still discussions on our Facebook page and our inbox is always open at thegeekygourmet@gmail.com.

<3 Elle

Tuesday, October 5, 2010

Tasty Starters

Okay. I know it's not a big landmark number or anything, but Howie just posted show #5. We've been doing this for over a month and I think we really might have something here. It's pretty exciting! We're closing in on 200 "likes" on Facebook, which is neat and weird at the same time. I have a few more people following this here blogging contraption, too! Although, I will admit that I wish I had never pressed the "stats" button. The traffic this thing gets, or lack there of, makes me slightly sad. However, a great man once said, "We must press on!" (Thanks, Adam.)

So here we go. Show #5 was about appetizers- those delicious nibbles to whet your appetite and wake your palette up in hopes to better the experience of your entire meal. What we now see in most casual and fine dining restaurants come from either simpler or more elegant beginnings. Especially in the United States, the bigger and better attitude has taken the simple canape and turned it into something like "Joe's Rockin' Rib Rolls". I'm not saying that's a bad thing, but it's certainly different.

Here are some of the most popular appetizers people have come to enjoy:
  • Mozzerella sticks (this was the most popular answer along with "anything with cheese"
  • chips and dip
  • potato skins
  • fried calamari
  • onions rings/bloomin' onion
  • hot wings
  • cheese fries
  • jalapeno poppers
  • fried mushrooms
  • garlic bread
Those were to most common answers from my friends, family, and classmates when I asked them what their favorite restaurant-style appetizer was. Some of the answers like clams casino or blackened tuna bites with horseradish cream, were a bit more unique.

Once you come up with something yummy and marketable in restaurants the next step, of course, is to make it available at home. Unfortunately that's not always the best idea, in my opinion. Now there seems to be an issue with overly processed, pre-packaged junk that isn't good for you and it's definitely not good tasting.

In response to this "junk", chefs and home cooks alike are looking for and creating new, fresh, and delightful treats. I am among those chefs and home cooks. And that means I have a few recipes to share!

Here's hoping you'll never have to buy frozen, breaded mozzerella sticks again:

Homemade Mozzerella Sticks
1 pkg string cheese (there's usually 12 sticks per package), unwrapped and cut in half
1/2 C. all purpose flour
1/2 C. bread crumbs (Italian, plain, panko...whatever you like)
2 eggs + 2 Tbsp water, beaten well

Preheat a large skillet on medium to medium-high heat. Add enough oil so that there is about a 1/4 inch layer in the pan and 2 Tbsp butter. Allow the butter to melt into the oil and let the mixture heat up. DO NOT LET THE OIL SMOKE OR BURN. Test the oil to see if it's hot enough by placing the end of a toothpick or wooden skewer in the oil. If bubbles form rapidly around it, the oil should be ready. Roll the cheese sticks in flour first, then gently shake off any excess. Dip them in the egg wash, then finally coat them very well in the bread crumbs. Carefully place the cheese sticks in the hot oil, a few at a time. Cook for 30 to 45 seconds then turn them and allow to continue cooking. The cheese sticks should only take 1 to 2 minutes total to cook. Let them drain on a paper towel after frying. They should be crispy and golden brown on the outside, soft and gooey on the inside.

Here's a recipe that can easily be changed (I'll share a few variations) and is great for parties or potlucks:

Easy Stuffed Mushrooms
2 pounds cremini or white button mushrooms, cleaned and stems removed
1 8 oz. pkg cream cheese, softened
1/2 C. grated parmesan cheese
1/4 C. grated provolone cheese
2 Tbsp fresh chopped chives, sage, basil...whatever fresh herbs you have on hand
1 pound Italian sausage (or your favorite bulk sausage), browned and drained
Salt and Pepper to taste
4 Tbsp melted butter

Mix together cream cheese, 1/4 C. parmesan cheese, provolone cheese, herbs, and sausage. Season with salt and pepper if necessary. Fill the mushroom caps with the cheese and sausage mixture. Place in a large baking dish. Sprinkle with remaining parmesan cheese and evenly pour over the melted butter. bake in a 350 degree F oven for about 20 minutes or until the tops of the mushrooms are golden brown. Serve warm.

There are a lot of variations with this recipe. You can really use what ever kind of cheese you'd like. You can also substitute the sausage for a package of frozen spinach that's been thawed and drained. You could also use chopped artichoke hearts or bell peppers or a combination of all 3 vegetables. Oh! And as Howie pointed out during the show, if you're using white button mushrooms, reserve the stems, chop them up and add them to the filling. That way there's no waste :)

If you need some more ideas for quick, easy, and yummy appetizers send us me an e-mail at thegeekygourmet@gmail.com

Enjoy!
Elle

Sunday, October 3, 2010

I'm strong to the finish, because I totally love spinach!

However, I am not Popeye the sailor man. But, I do love the cartoon :)

This week's installment of the Geeky Gourmet was about a leafy green that most kids grow up hating- spinach. Yes, it's green and it's good for you. It's enough to send my boyfriend running for the hills. Well, really he just makes these hilarious faces and says ewww!

Me? I love spinach! Howie really likes it too, so I think we both really had a lot of fun with this show. Howie even contributed a recipe of his grandmother's. We found some pretty interesting things about the nutritional value along with all the other research. Did you know spinach contains tryptophan? Yeah, I didn't either. And while it's true that a serving of spinach has a good portion of your daily iron intake in it, vitamin K, vitamin A, manganese, and folate are much more prominent nutrients.

I find that spinach is fairly easy to grow, if that's something you're interested in. The key to growing spinach is loose, nutrient rich soil and a good balance of sun light. Too much direct light will damage the leaves. Bright morning sun and afternoon shade are ideal, along with plenty of water.

There are a lot of uses for spinach in either of it's forms. I use the frozen stuff when making dips, stuffings, or casseroles. I like the fresh leaves when making salads, sandwiches, and when sauteing or creaming it as a side dish. And speaking of lots of uses, here are a few recipes as promised:

Howie's Grandmother's Borekas

2 bunches of spinach (2 boxes of frozen spinach, thawed and drained or 2 regular bags of fresh spinach should work)
3 eggs, lightly beaten
1/2 pound feta cheese, crumbled
1/4 C. grated parmesan cheese
1/8 tsp. kosher salt
1 box of phyllo dough, thawed
1/2 stick unsalted butter, melted
1 egg, well beaten plus 1 Tbsp cold water (egg wash)

Mix all ingredients (except phyllo and butter) together well in a bowl. Set aside. Layer 2 sheets of phyllo together, brushing melted butter between each layer. Using a pastry wheel or pizza cutter, cut the phyllo into approximately 2-inch wide strips, length wise. Place a small amount of the spinach mixture at the top of each column of phyllo. Fold the phyllo into triangles like you would a paper football or a flag. Brush the tops with egg wash. Place on a sheet pan. Bake all the Borekas on a greased or lined sheet pan at 350 degrees F for about 12 to 15 minutes or until golden brown on top; "Bake until done", according to the original recipe. Just be mindful of when you put these in the oven. Phyllo can over-bake or burn really easily.


Here's a "weird" one. It is a little different, but tasty and refreshing:

Watermelon and Spinach Salad

1 bag of baby spinach
3 C. watermelon (seeded or seedless), diced
6-8 oz. feta cheese, crumbled
1/2 C. red onion, VERY thinly sliced
Your favorite vinaigrette, sweet and sour or poppy seed dressing

Top a bed of fresh, baby spinach with the red onion, feta and watermelon. Finish with the dressing of your choice. Simple, right? And it's tasty, too :)

And finally, something that's making a come back on Steakhouse menu's across the U.S., Creamed Spinach

1 bag of baby spinach
2 Tbsp olive oil
1 clove of garlic, minced
1/2 C. heavy cream
1/4 tsp. ground nutmeg
Salt and Pepper to taste

Heat olive oil and garlic together in a pan until the garlic is fragrant, then add all the spinach. Allow the spinach to wilt for 3-4 minutes before adding the cream. Add the cream to the wilted spinach and continue cooking for 5 minutes to reduce the cream. Add the nutmeg and season the, now, creamed spinach with salt and pepper to your liking. Serve hot and enjoy! Adding a little grated parmesan never hurt, either ;)


I hope y'all have enjoyed the show and will try the recipes. If you've got questions or comments, just let us know! Find us on Facebook, Twitter or e-mail us at thegeekygourmet@gmail.com

Elle

Sunday, September 19, 2010

Glorious Butter!

Show #3 is here and we're talking about butter! We have some fun facts to share and some recipes, too. I hope you'll give us a listen and enjoy :)

In the first segment, I mention that I was at my Aunt's wedding a few weekends ago and that the theme was cows; Jerseys and Holsteins. It was all very adorable. And here's the cake!


(And also a cowbell...)


A few fun facts I forgot to mention on the show:
~It takes roughly 10 quarts (or 21 pounds) of whole milk to make 1 pound of butter.
~Food scientists have discovered over 120 unique flavor compounds in butter which contribute to it's flavor.
~The United States produces 1.2 billion pounds of butter each year.
~Butter (like *many* other things) was once used as currency. People would barter for merchandise at a town store or general store with butter.

Now to the really good stuff- the recipes!

Mason Jar Butter
1 pint of heavy cream*
1 large mason jar with lid and ring
cheese cloth

Let the cream come to room temperature. Pour it into the mason jar, put the lid on VERY tightly and shake it to your heart's content! It'll take 20-30 minutes to actually form the butter. I made this little project a family affair (because my arms was getting tired). My family took turns with me. I did manage to take a few pictures so you know what to expect.

Starting out with cream and a jar with a good, tight fitting lid.


After about 5-6 minutes, it should be a beautiful whipped cream consistency.


When you hit the 15-20 minute mark, you should start seeing something like this. The butter is starting to form, meaning the butter fat is separating from the buttermilk.


You can stop shaking when you see this- a big clump of butter in the middle of all that liquid.

Now comes the dirty work. You need to get a medium bowl and place a few layers of cheese cloth in the bottom. Pour all the contents (solid and liquid) on top of the cheese cloth. Strain the butter, then rinse it under cold water (while wrapped in the cheese cloth) until the water starts to run clear. Then dab the little bundle of joy with a paper towel to get rid of any excess water. Finally, put your butter into an air tight container and voila! Homemade butter. And let me tell you, it's worth the sore muscles. If you'd like to have salted butter, add about a half teaspoon of salt after the butter is made and rinsed. Mix it very well before storing. This makes just under a cup of butter.

Yay! Almost done. Just have to rinse and add salt. Then you have...


...glorious, fresh butter!

*It's best to use regular ole heavy cream. Avoid "whipping cream" as sometimes it contains a bit of a sweetner. It's also a good idea to avoid "Ultra-Pasteurized" cream. It's hard to come by around these parts, but the fresher and the less it's been processed, the better.

And now, death by cookies! Brought to you by the American Heart Association's list of things that will clog your arteries! Okay, not really. But these are definitely meant to be a treat and made every once in a while.

Buttery, buttery shortbread cookies
2 cups (1 pound) unsalted butter, at room temperature
1 cup granulated sugar
4 cups all-purpose flour
2 Tbsp. cornstarch
1/2 tsp. salt
1 tsp. vanilla extract

Preheat your oven to 350 degrees (F). Line 2 baking sheets with parchment paper. Beat the butter with a hand mixer or a in a stand mixer for about 5 minutes. Then add the sugar and cream together for 2-3 minutes at medium speed. Add the cornstarch and flour. Mix until all ingredients are incorporated. Roll into 1 inch balls and flatten them on the cookie sheet slightly with your fingers or palm. Bake at 350 degrees (F) for about 15 to 18 minutes. The tops should be VERY light, golden brown. Allow to cool for about 5 minutes before transferring to a wire rack to cool completely. They are totally yummy while slightly warm, but they taste even better the next day. The recipe makes about 4 dozen cookies.


Compounds Butters
Apricot-chipotle butter:
2 sticks unsalted butter, at room temperature
1 Tbsp chipotle in adobo sauce (1 chipotle seeded and minced, plus sauce)
2-3 Tbsp of apricot preseves (depending on how sweet you'd like it)

Garden Butter:
2 sticks unsalted butter, at room temperature
2 tsp of the following (fresh or dried):
Basil, oregano, thyme, parsley, lemon zest
1 tsp crushed red pepper flakes
1 clove of garlic finely minced
Salt and Pepper to taste

Cinnamon-honey butter:
2 sticks unsalted butter, at room temperature
2 tsp ground cinnamon
2 Tbsp honey

To make any of these, simply blend all ingredients well with a spatula, hand mixer, or in a stand mixer. You can serve these as just a spread or you can roll the butter into logs and freeze them. Then cut slices of the logs to top meat, potatoes, or soups for a last minute addition of flavor.

Hollandaise
Here is the best reference and set of recipes I could find for Hollandaise. I took a second look at Alton Brown's and realized that I only used his measurements, but everything else was different. So, here ya go. Happy sauce making!

Questions, comments, etc.? We want to hear them! Leave a comment here on the blog, on our Facebook page or at thegeekygourmet@gmail.com and we'll get back to you asap :)

<3 Elle

Monday, September 6, 2010

Fat Show Follow-Up

Just a few things to mention in regards to the Fat Show on The Geeky Gourmet:

  • Lemon confit using beef tallow? TERRIBLE idea. I'm going to give myself a little bit of credit for experimentation, but that's it. It's vile. Just don't do it.
  • Hot Doug's in Chicago- If you have the opportunity to go, DO IT! If I ever get the chance to visit Chicago, I know I'm going. And if you do go, report back. Please let us know how you liked it. (P.S. It has it's own theme song!)
  • The Chip Shop has 2 different locations and can be found online here. *site makes noise
  • To find out more about the Texas State Fair and all of it's fried food glory, check this out.
There are a few more recipes to come; I believe I still owe y'all a few fig recipes. So, keep watching and listening!

Elle

Friday, September 3, 2010

Respect the Fat!

Show #2 is here and ready to go! It's all about fat. More specifically, animal fats like lard, griebenscmalz, beef tallow...things like that. I had a lot of fun getting prepared for this show. I always learn something new from our research. I also tend to learn things from Howie. I mean, I might be the expert, but he's old. And with age comes knowledge of things from long ago. I'm totally going to get in trouble that statement.

As always, there is at least one recipe to go along with the show. And here it is!


Cracklin' Cornbread

1/4 cup butter or bacon grease

2 cups self-rising cornmeal

1/2 cup all-purpose flour

2 1/2 cups buttermilk*

2 large eggs, beaten

2 tsp. sugar or honey

1 cup cracklin's (the fresher, the better)


Heat a large cast-iron skillet** in a 425 degree oven for about 4 to 5 minutes. Meanwhile, stir together the cornmeal, flour, buttermilk, and eggs just until combined. Try not to over mix. Lumps are ok. Gently fold in the cracklin's last. Carfeully take the pan out of the oven (please remember your oven mit!) and melt your butter or bacon grease in the hot pan- slightly tip and swirl the pan to coat the bottom. Pour the cornbread batter into the hot pan and place it back in the oven for about 25 minutes.


*You can use whole milk, however buttermilk is recommended; not only for it's flavor, but for moisture.

**If you don't have a cast-iron skillet, you can do the same steps with a glass or metal baking dish.


Now, I do have a little secret to share. If you're worried about your cornbread being dry you should try adding one small can of creamed corn. Trust me, the above recipe is fool proof. It's moist and the flavors are well balanced every time (as long as you don't over cook it). But if you like a creamier, more pudding-like consistancy, try this little trick.


Try the recipe ,if you are so inclined, and tell me what you think about it! Take a picture and send it in, send a comment or a suggestion for other recipes, send a recipe of yours...we'd love to hear from you! Send to thegeekygourmet@gmail.com


I hope y'all are enjoying the show and the blog and the recipes and...well, everything! thanks for the support and thanks for listening!


Elle

Tuesday, August 31, 2010

Shocked and humbled


It's been 4 days since The Geeky Gourmet made it's debut. We now have 145 people who "like" us on Facebook and we've seen nearly 100 unique IP addresses download the show. That means that at least 145 people know we exist and almost 100 people have listened to some part of our show. Those are very exciting numbers! You'd think that those facts would inflate my ego. However, it's very humbling to know that many people care about me and Howie and what we're doing. The support from everyone is such a blessing. This gives me motivation to make improvements where needed, always keep our listeners interested, and to not let y'all down.

This experience has been a lot of fun. The facts that we come across through research, the funny blogs we read, or the things I see that inspire me...it's all such a pleasure! I'm even enjoying learning about the recording and radio business. And when we're actually recording the show? It's a blast! I couldn't ask for a better co-host (or producer). With that said, I'll admit that it is a bit of work. While I can honestly say I know a lot of this off the top of my head, I do want to be sure I get my facts straight before I claim to be "the expert" and tell our listeners all about it. I try to make sure I'm not leading anyone astray. There is lots of research done. There's also a good bit of planning involved.

The best part, for me, is sharing my passion with others. I love to cook and bake and basically be immersed in the culinary world. If I didn't I wouldn't have this blog and I certainly wouldn't be making this show. My personal goal for The Geeky Gourmet is to share the knowledge I have about one of the greatest passions in my life. If you're interested in something, you generally want to learn more about it, right? I want to help people with that. If you are interested in something that I know lots about, I'd love to share what I know with you. And if I don't know so much, then I'd like to learn more about it myself!

I have a good many things left to learn. I hope that I never stop learning, actually. And I'll always be able to make improvements. That is the case in many aspects of my life and career. My cooking skills and the food I create can always be made better. My relationships with friends and family can always be made just a little bit stronger. There will always be room for improvement in our show. The important thing is to have a strong foundation. And that's what I/we have. Now it's time to start moving forward and adding on to what we've already got.

I'm extremely proud of Howie and myself and the show we're producing. I appreciate all the support and feedback. It means more to me than I can convey in writing. I hope that you'll all keep reading, keep listening, and keep learning.

<3 Elle

P.S. We now have a gmail account! If you've got a recipe you'd like to submit, a story to share, or if you just want to say "Hi!", write us at thegeekygourmet@gmail.com. And as always, you can find us on our Facebook or Twitter pages.

Friday, August 27, 2010

Insert fanfare music here!

Y'all! It's here! My first show! And while the show is called "The Geeky Gourmet", you're going to find out why I am the Giggly Gourmet. There are a lot of giggles. But beyond that, there is good information and a show that I'm really proud of. Howie did an amazing job co-hosting and producing this. It is the first one, so there are always some glitches. The good news is that it only gets better from here.

I really hope you all enjoy this and of course I welcome constructive critiques, comments, and questions.

Show #1- Figs!

The show is split into 4 segments, basically so it makes it easier to download and/or e-mail.

Below are some of the recipes I talked about on the show. There will be more of them posted later this week. Some just need a little more testing before I feel comfortable enough to share them.

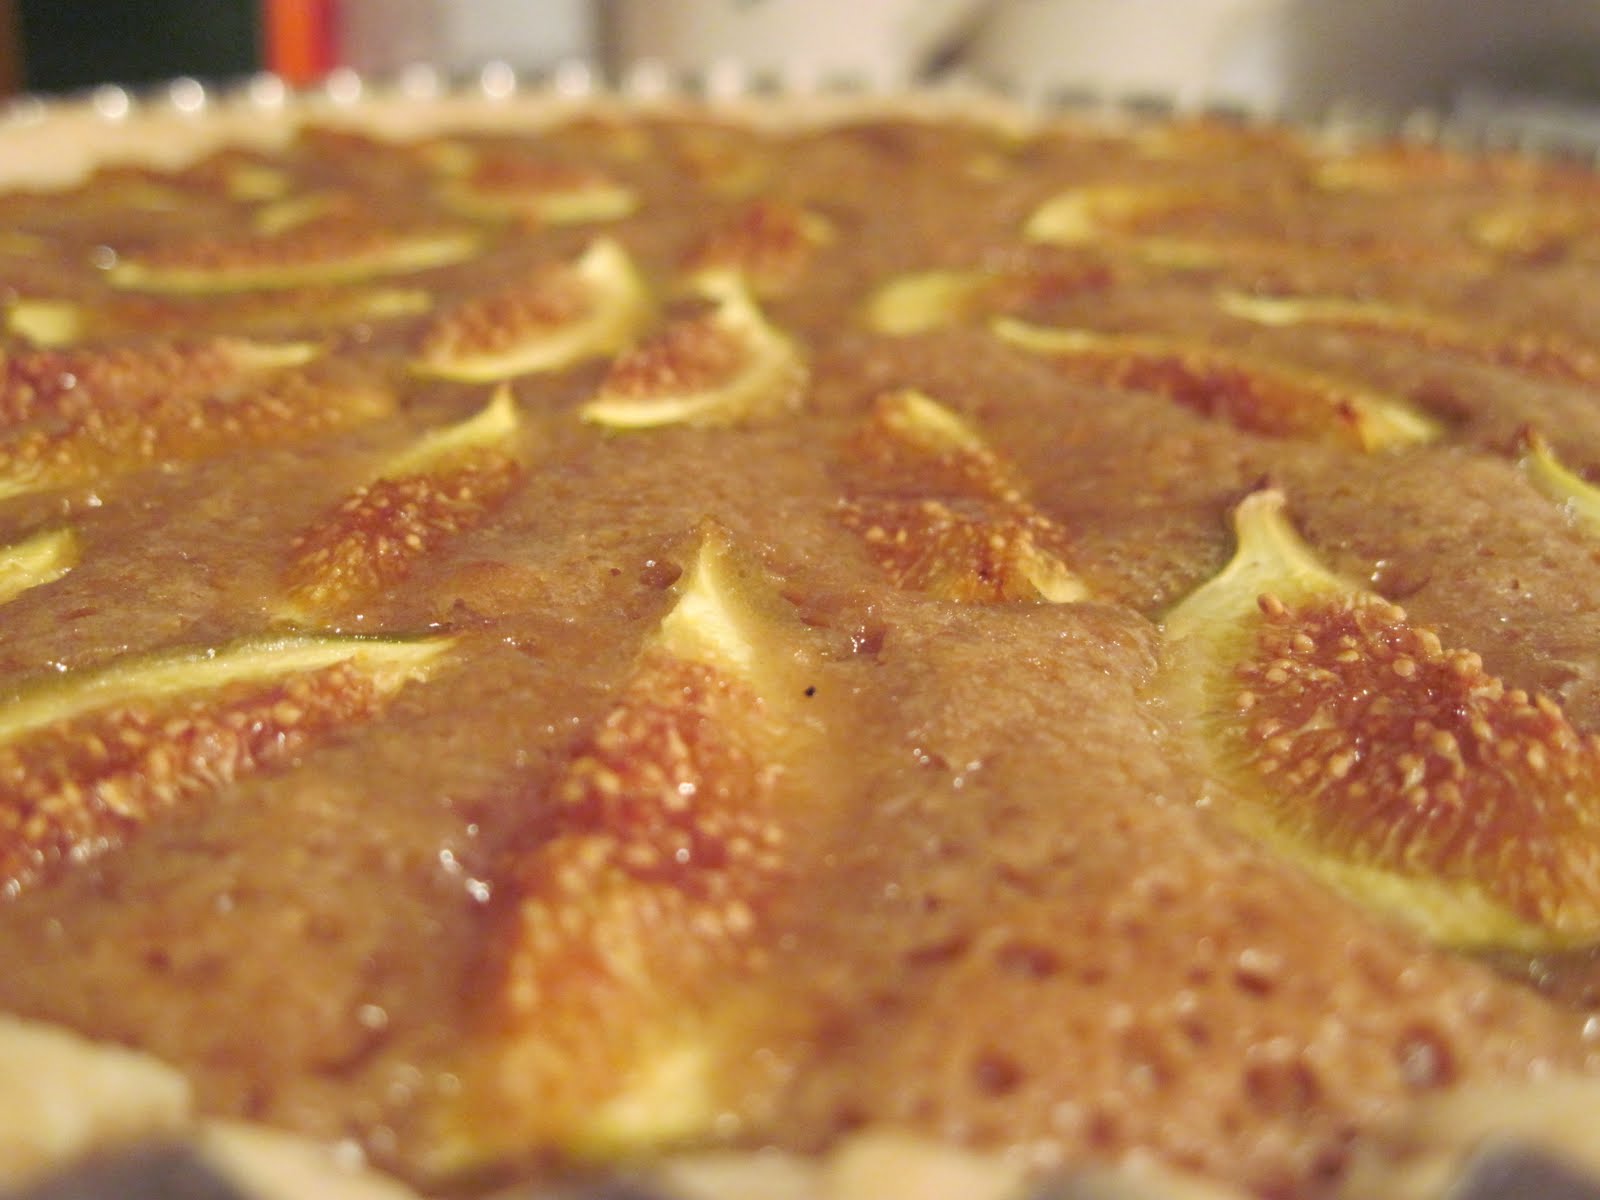
Fig Tart
10-inch pastry crust:
1 stick (1/2 cup) unsalted butter, cold and cut into cubes
1 1/3 cup all purpose flour
1/2 tsp kosher salt
3-4 Tbsp cold water

In a bowl, combine the flour and salt. Cut the butter into the flour mixture until the particles are pea sized. Sprinkle in the water a little at a time moving the flour with your hands to try and work the mixture into a ball. If it's a little sticky, add a bit more flour. Wrap it in plastic and you'll want to refrigerate the dough ball for about an hour. After it's chilled, place the dough on a floured board and roll it out into a 12-inch circle. Place the dough in a 10-inch tart or pie pan and press it in gently so it clings to the sides. Trim any dough hanging off the sides of the baking pan and patch any holes or cracks with dough scraps. Using a fork, perforate the dough all over. This will help the air escape so the crust doesn't puff up. Pre-bake the crust in a 350 degree oven for about 15 minutes or just until it is very lightly browned. Cool completely before filling.

Tart Filling:
1 stick unsalted butter, melted
2 eggs
1 cup light brown sugar
1/2 cup all purpose flour
2 tsp candied lemon peel, minced (or 1 tsp fresh lemon zest)
1 tsp vanilla extract
pinch of salt
12-15 fresh figs, quartered

Combine all ingredients except for the figs. Pour the filling into the cooled tart shell. Arrange the figs on top of the filling in an even, single layer. I chose to arrange them in a circular fashion. Bake the completed tart for about 20 minutes in a 350 degree oven. The middle may be slightly gooey.

Cool completely, cut, and serve!


Figs "Foster"
1 cup light brown sugar
1/2 tsp ground nutmeg
1/2 tsp cardamom (optional)
1/4 cup unsalted butter
1/3 cup dark rum
10 figs, halved
vanilla or brown sugar ice cream

Combine the butter, spices, and brown sugar in a skillet. Cook over medium heat until the sugar dissolves. Carefully place the figs in the pan and cook for about 3 minutes. Then, add the rum and continue cooking the mixture until the rum is hot. VERY CAREFULLY set the rum aflame with a long stick lighter or long match. If you have a gas stove, you can gently tilt the pan to catch the flame that way, as well. When the flame subsides, lift the figs out of the pan and divide them evenly among portions of ice cream. Spoon the warm sauce over the figs and ice cream.dd

Serve immediately.

**The step in the recipe where you set it on fire is completely optional. I still recommend adding the rum for flavor, though. If you don't want to use rum, you can add about 1/3 cup of apple juice to thin the sauce.


Recipes coming soon:
Late Summer Salad with Roasted Figs
Thumbprint cookies with fig "jam"
Kelly's Fig preserves

Again, if you have any questions you can e-mail me (thegeekygourmet@gmail.com), leave a comment here, or find us on our Facebook page.

<3 Elle

Edit: I have a list of people I'd like to thank that I may have missed on the show (I know this isn't the Oscar's and I'm not Sally Field, but regardless...):

My parents for putting up with my nonsense, letting me ruin the kitchen, being my tech support, and being my guinea pigs.

My Aunts L and S for being wonderful foodies and full of ideas.

My Charlie for putting crazy ideas in my head, wanting me to cook, eating my food whether it's good or not, and for coming up with crazy food combinations that actually work.

Justin for his awesome artistic abilities and creating such a great logo.

My slores for keeping me calm and level headed when I get nervous about trying new things.

Howie for making me start this blog again, being my fantastic co-host, having enough faith in me to pull this show off, and for doing a rock awesome job editing and producing.

Publix of Anderson, SC for having figs and always being so nice!

And all of you! The people reading this now, listening to the show, and spreading the word. Thank you so much!